Your new email account grants you access to many of the services and facilities provided by the University of Southampton.
It is important that you check your University email account regularly. The University and Centre for Research on Ageing will communicate important information to you via this email address, such as information about your course, assignments and feedback on your assignments.
How to set up your new email account
You can subscribe online from any computer and you will be asked to provide your student number (located on the Welcome email/letter sent to you, or available from your Student Office or the Student Services Centre), your surname and date of birth. Later during this process you will be asked to select a password to use with our services.
Step-by-step guide
In the steps that follow, it is essential to type your personal details as they appear in the information in your introductory pack. If you make a mistake, simply use the BACKSPACE key to correct the error. Most screens require you to press a Next button to proceed to the next screen.
- Go to Subscribe.
- Click on the 'Create your University computing account' link.
- Enter your details and the system should now recognise you. If you receive an error message, check and correct your entry if necessary. You will be asked to Accept the conditions displayed.
- Complete the answers to the security questions and answers. Please note that you may change the questions if you wish.
- You will be assigned a username. Important note: Make sure you write the username down as you will need it later and it will not be displayed again.
- Choose and type in a password, and then type it again to confirm it. This is a safeguard to ensure you did not make an error when typing the password. Important note: Make sure you tick the boxes to show whether you want to be included in the external on-line directory.
- Click on Next and as long as no mistakes are found, you will see a message stating that you have successfully subscribed. Congratulations, you have a University of Southampton computing account! Keep trying until you receive the congratulations message.
- Your account will become fully active within 30 minutes.
- Instructions to begin student enrolment.
How to check and reply to emails using Office 365
Your University email is provided through Microsoft Office 365. This guide helps you learn how to check and reply emails using Office 365 via SUSSED. Important “clicks” are circled in the screenshots.
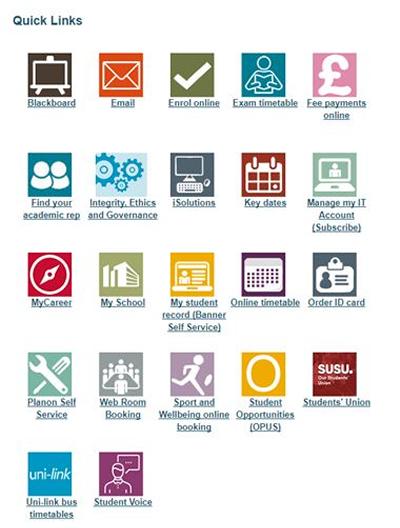
You can access your email from the SUSSED web portal. You can login to the SUSSED portal from anywhere in the world and see exactly the same resources, including any bookmarks that you have set up.
It is recommended that you access the service via the Sussed Portal. Select the ‘Students’ tab and then click the ‘Email’ icon to open your email account.

How to send an email?
To send an email, click New (on the top) and a mail message window will appear.

Type the recipient’s e-mail address in the To or Cc.
Double clicking To will give access to the Address Book which lists all University Staff and Students.
An alternative to finding CRA staff members’ email addresses in the Address Book is to copy and paste their email address from the CRA staff page. You can also find CRA staff email addresses in the MSc Student Handbook.
If you are adding several names, separate the names with a semicolon (;).
In the Subject box, type the subject of the message.
When your e-mail is completed, click Send.
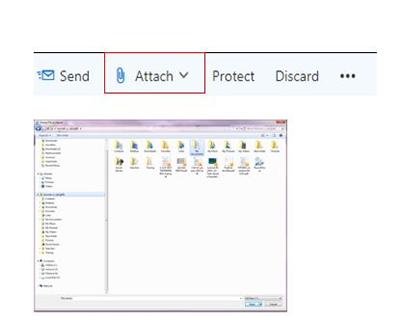
If you wish to add attachments to your email click the paper clip icon at the top of mail message window.
You should then click choose file. You will be directed to a dialogue box.
Locate the file you want to attach within your computer. If you wish to add attachments to your email click the paper clip icon at the top of mail message window.
How to read email and reply?
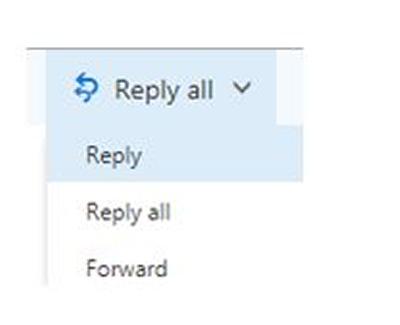
In your Inbox, double click the e-mail you wish to read. The contents of the message will appear in a separate window. You can choose the following actions from the top right hand side of the window:
Delete the message
Reply to the sender or Reply All to all email recipients
Forward the message to someone else
How to add E-mail signature?
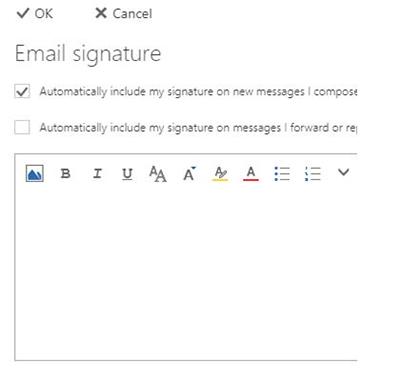
- Click on the (cog symbol) icon on the top right.
- In the ‘search box’ search ‘signature’.
- Select ‘email signature’.
- Use the text editor to create your signature in the blank box.
- Check the Automatically include my signature on messages I compose make this the default for all your messages.
- Once complete, click on ‘ok’.
How to use Outlook Calendar?
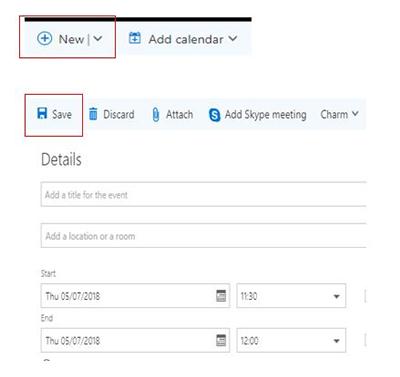
Click on the Calendar icon in the bottom left hand corner.
This will open the calendar view. To add an appointment, click on New at the top of the calendar screen, and a new window will open.
Fill in the appropriate details in this window and click Save and Close.
Find out more
For additional tips, visit the iSolutions help page.
What's related
